Digital systems design
EE-334
Working with your own computer
Page content
You have two options for working with your own computer:
- Linux servers to run Vivado + a small local install of Vivado Lab edition to program the FPGA
- Local installation of the full version of Vivado (preferred)
If you have space for a local installation (around 60 GB during installation and 40 GB after), then a local installation is recommended as the entire tool-chain will live on your machine. Otherwise the virtual machines can also be used.
1) Linux servers + Vivado Lab Edition installed locally
This option will see you use the Linux servers for most of the work with Vivado, and then you use a small local installation (on your own computer) of the Vivado Lab Edition.
Preliminaries
First of all, you need to use the EPFL VPN remote intranet access if you are not on the EPFL network!
- Install the VPN according to this guide
- Connect to the the virtual machine STI-EDA-LABS-RTX in vdi.epfl.ch
Linux Servers
Please follow the tutorial on Working on linux servers for this part.
FPGA Programming
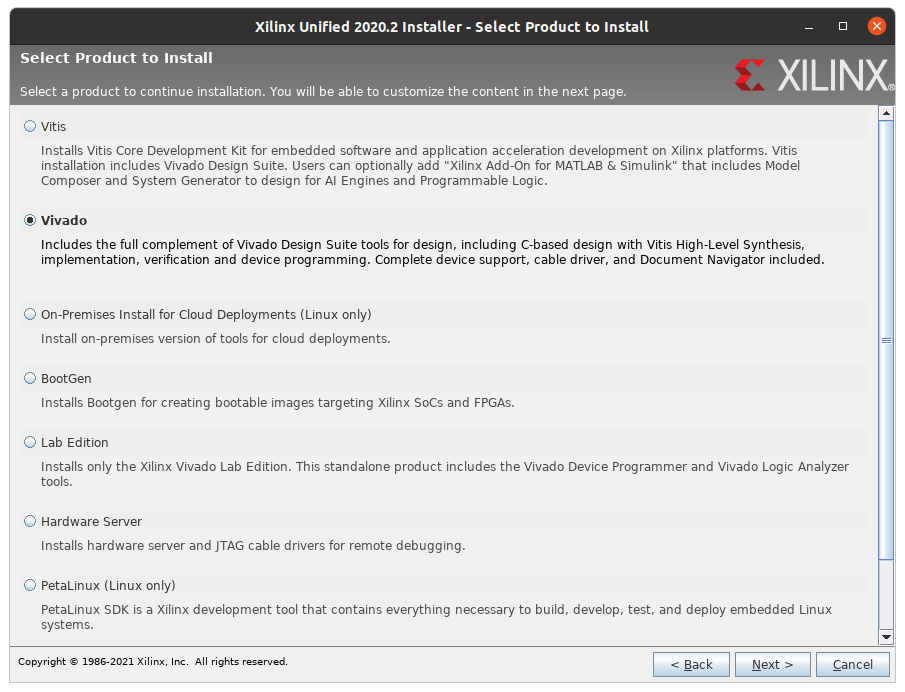
Note that to do the actual programming of the FPGA, you need to have the Lab Edition of Vivado installed locally. The lab edition for Vivado 2020.2 (the recommended version) can be downloaded from here. Just press 2020.2 for the version (left side of screen) and select one of the self extracting installers for your OS. You will have to make a user account with Xilinx to download the tool. A manual for the installation of the full tool-chain is available here (see chapter 4, section Download and Installation). When you do the installation, simply select Lab Edition (see the image below for the installation options) instead of Vivado. If you have issues with this installer, you can scroll down a bit further on the page where you downloaded the self-extracting installer and find an installer for the lab edition in a zip file which might work if the other installer fails.
At the end of the Vivado tutorial (Lab 1), you will then download the generated bit-file from the server to your local machine and use Vivado Lab for the actual programming. You can do this by using WinSCP (Windows) or scp (Linux), assuming you are on the EPFL network or using the VPN. We provide a short guide on WinSCP for Windows on moodle at WinSCP for filesharing. These allow you to directly copy files/directories between the Linux servers and your own computer. See also Working on linux servers.
2) Local Installation of Vivado
With a local installation, you will run the full tool-flow on your own machine. This requires a Linux or Windows machine (Mac users can run Windows or Linux in a virtual machine on their own machines).
Installation
Vivado 2020.2 (the recommended version) can be downloaded from here. Just press 2020.2 and select one of the self extracting installers for your OS. You will have to make a user account with Xilinx to download the tool. A manual for the installation of the full tool-chain is available here (see chapter 4, section Download and Installation). When you do the installation, pick Vivado (not Vitis)
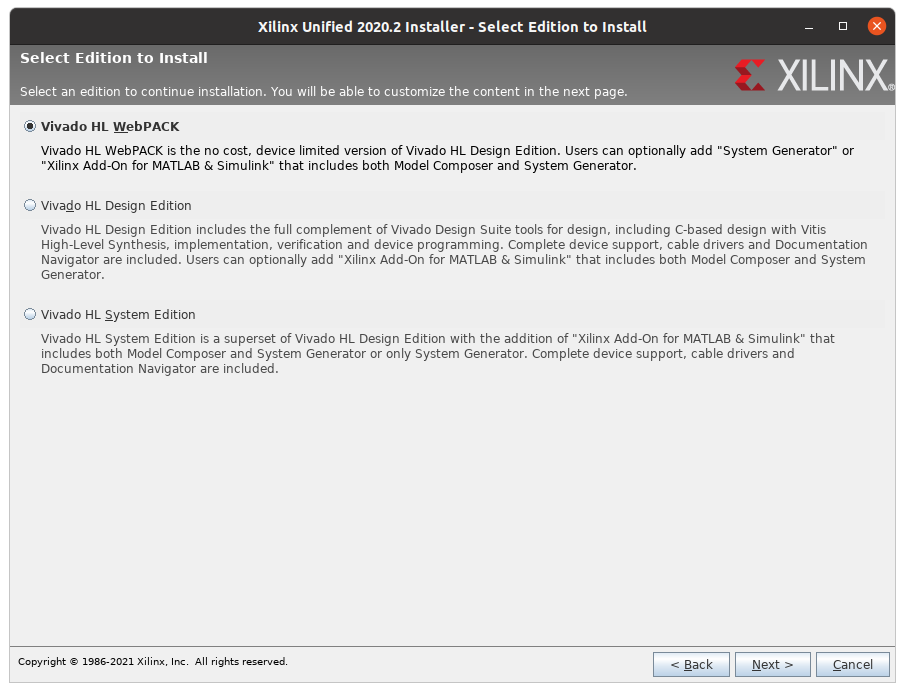
on the next page pick the free WebPACK version.
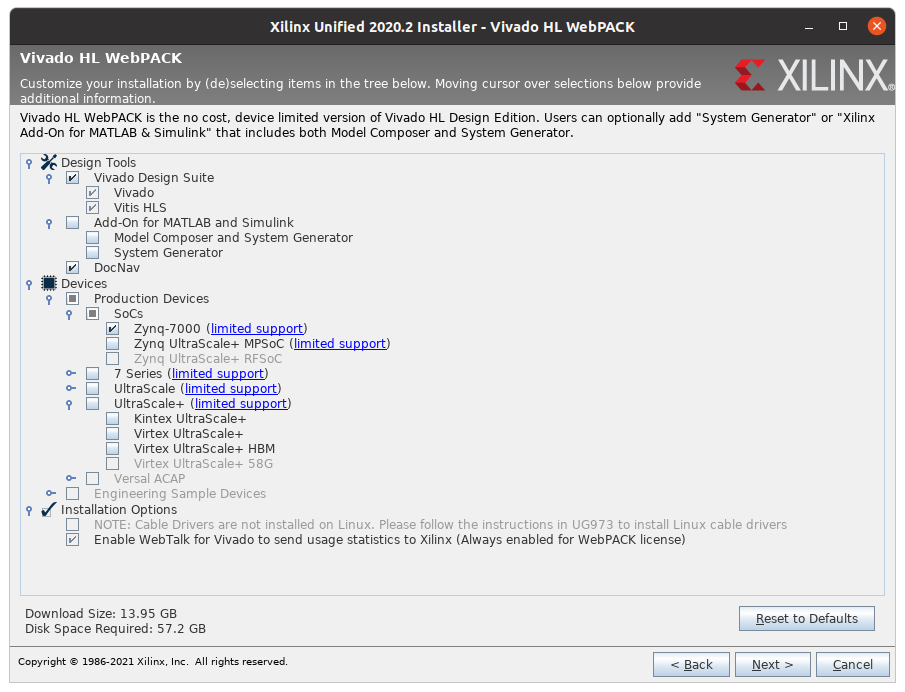
Note that this installation (depending on version) can take up to 40 GB of space after installation and may need up to 60 GB of space during the installation, which is why the virtual machine solution is recommended if you have little disk space. You can reduce the size by only picking the Zynq-7000 chip as this is the one we use. Some versions of Vivado also allow you to not install Vitis HLS along with Vivado which will save further space.
You can also install an older version like 2018.2 which will take up less space than 2020.2.
Board File Installation
If you do a local Windows installation, you have to install the board files yourself
So install the board files, you copy the sub-directory pynq/board_files/pynq-z2 from the zip file called lab01_vivado_handout.zip (on the moodle) and then copy it to the directory called board_files under your Xilinx installation.
As an example, the path could be C:\Xilinx\Vivado\2018.2\data\boards\board_files and you copy the pynq-z2 directory to get C:\Xilinx\Vivado\2018.2\data\boards\board_files\pynq-z2
For Linux users, you can either use the method described in the tutorial of starting Vivado with the -source option from the terminal or similarly copy the pynq-z2 directory into your Xilinx Vivado installation directory as done for Windows users. Vivado is installed to /tools
Linux Cable Drivers
For linux users, you also have to remember to install the cable drivers after installing Vivado. This can be done by running the install_drivers script, typically the command looks like (your paths may be slightly different)
sudo ./tools/Xilinx/Vivado/2020.2/data/xicom/cable_drivers/lin64/install_script/install_drivers/install_drivers